Robot Studio | User Manual
Robot Studio is a browser-based motion editing tool for robot platforms built around bus servo. No installation is required. Open it directly in a browser to scan servo, read poses, edit action group, play motions, and import or export JSON data.
Open the Editor
Before You Start
- Connect the adapter board (UC-01 or RUC-01) to your computer via USB.
- Confirm that the servo bus power supply is working normally. Otherwise, some servo may fail to be detected or angle reading may fail.
- Check in advance that every bus servo has a unique ID to avoid scan exceptions or recognition failures caused by duplicate IDs.
Use a browser that supports Web Serial, such as Chrome or Edge.
Quick Start
Connect
- After opening the page, select the appropriate baud rate at the top.
- Click Connect serial port and select the correct serial port device in the browser popup.
- After the first successful connection, the software automatically scans online servo.

Record the First Action Group
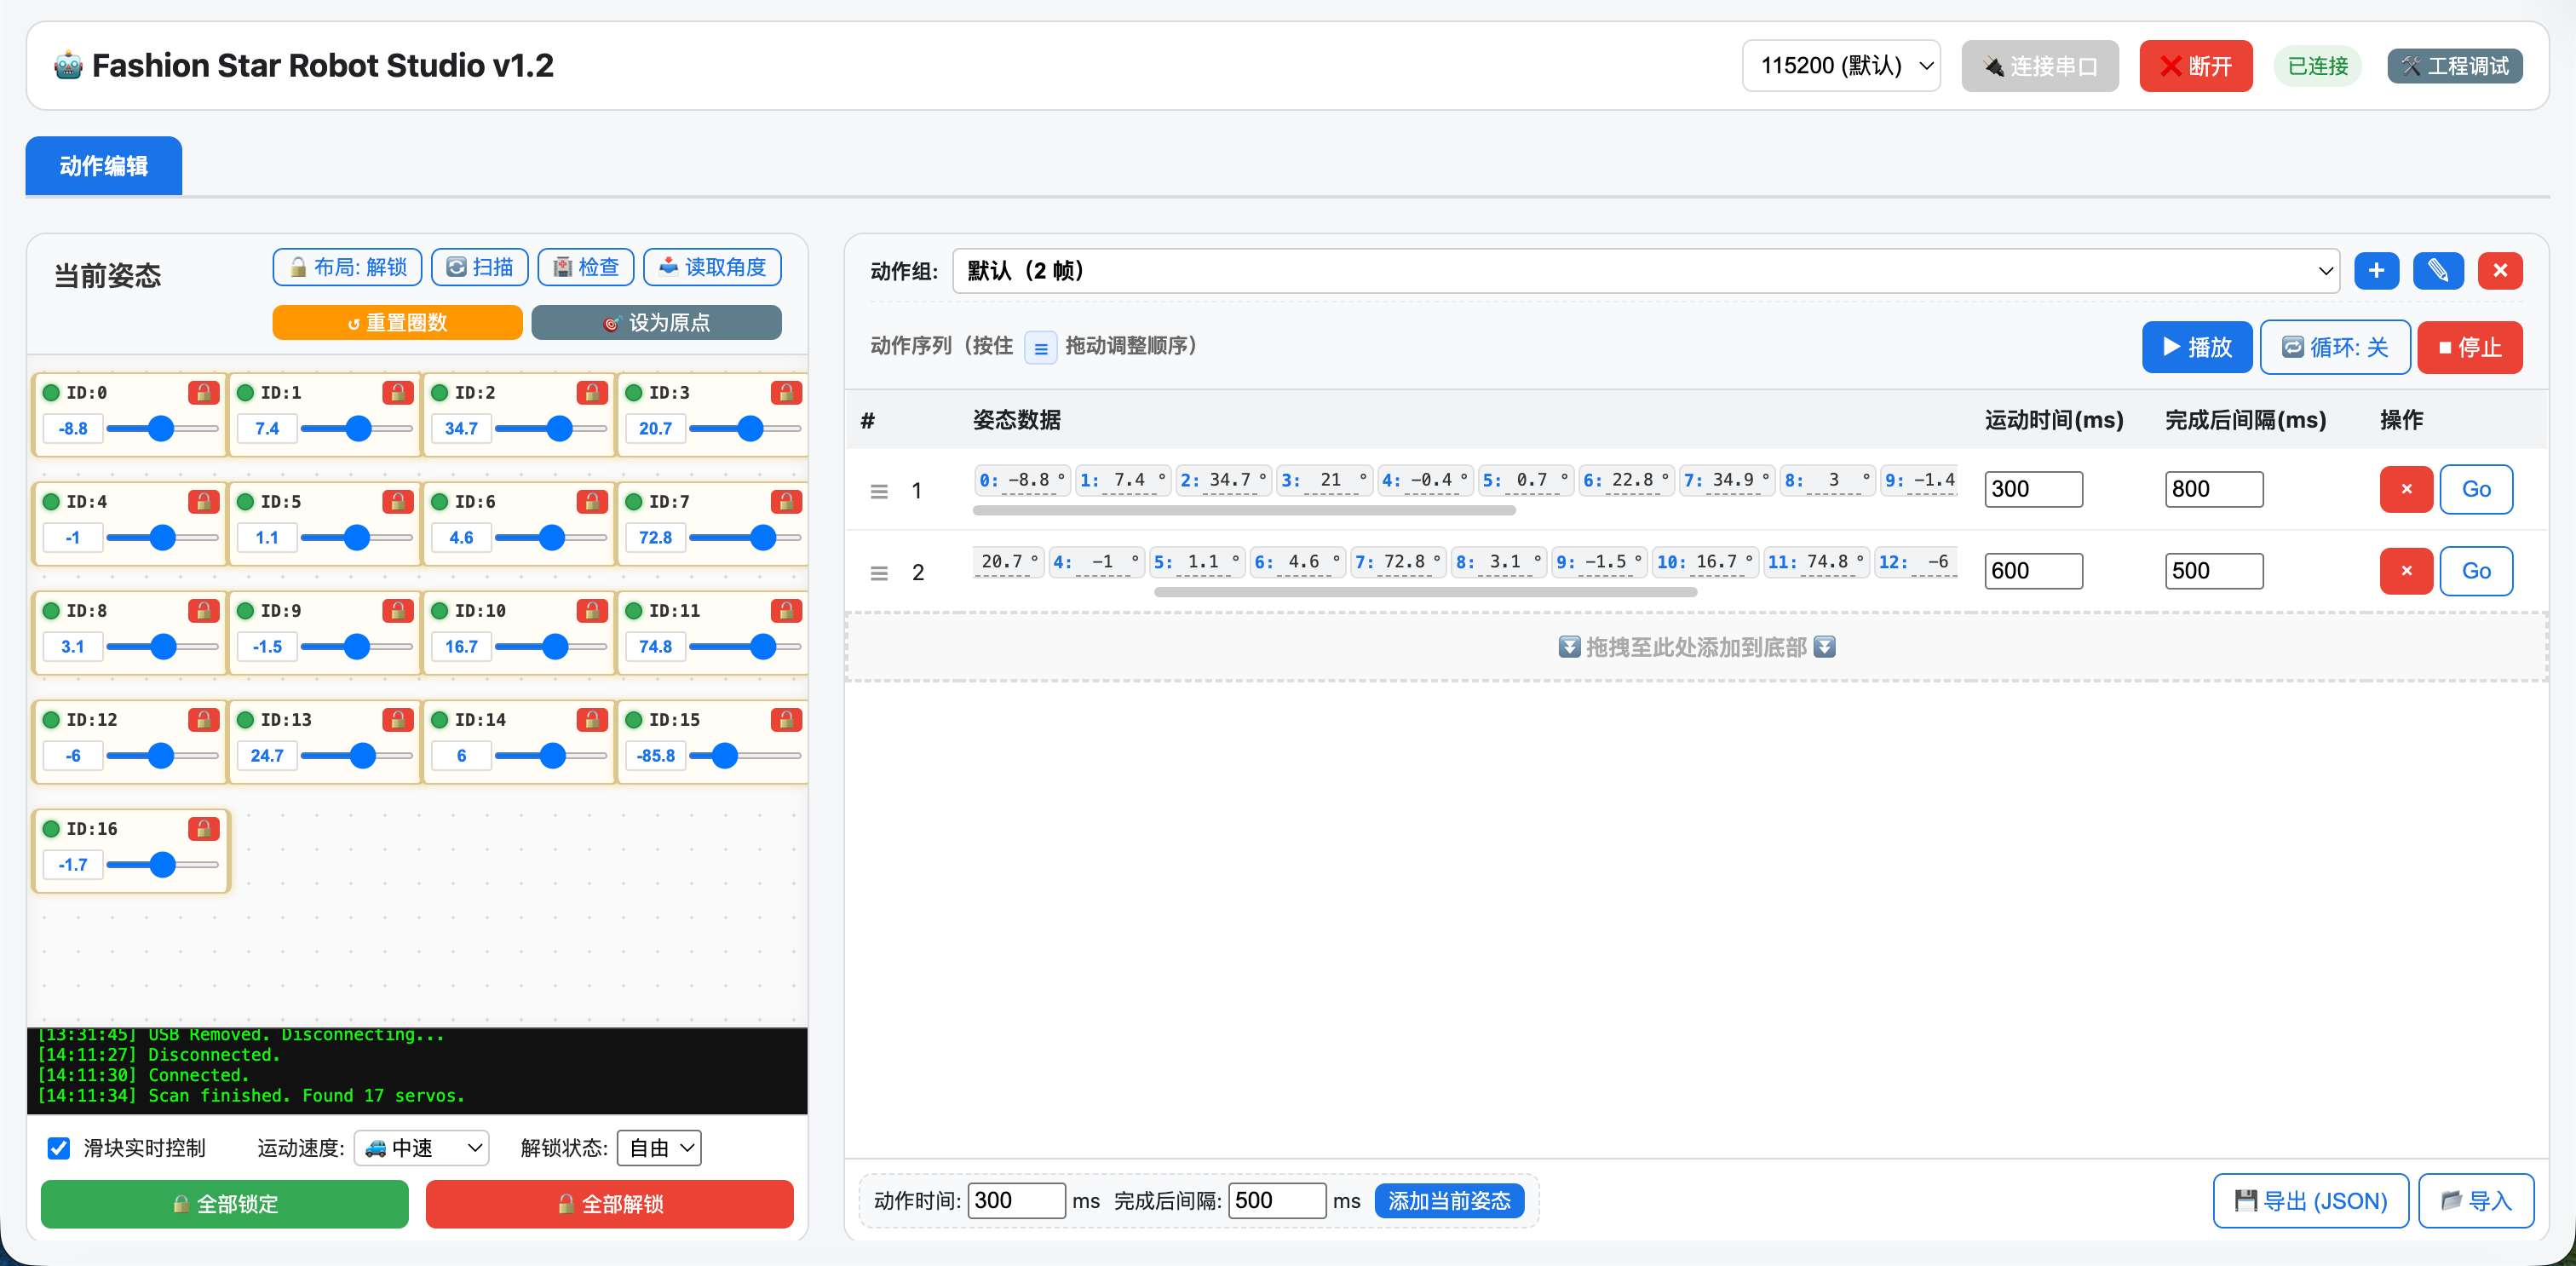
- In the "current pose" area, check the angle of each servo, and adjust the robot pose by dragging sliders or manually positioning the robot.
- To position the robot manually, click Unlock All first.
- If needed, click Read Angle to confirm that the current pose data is correct.
- Set Motion Time and Post-Move Delay.
- Click Add current pose to save the current angles of all servo as one frame.
- Repeat the adjustment and add steps to gradually build a complete action sequence.
- Click Play to test the current motion.
Export
- After confirming that the motion test passes, click Export (JSON).
- The exported JSON file can be used for backup, sharing, or later re-import for editing.

Other Current Pose Functions
Lock and Unlock
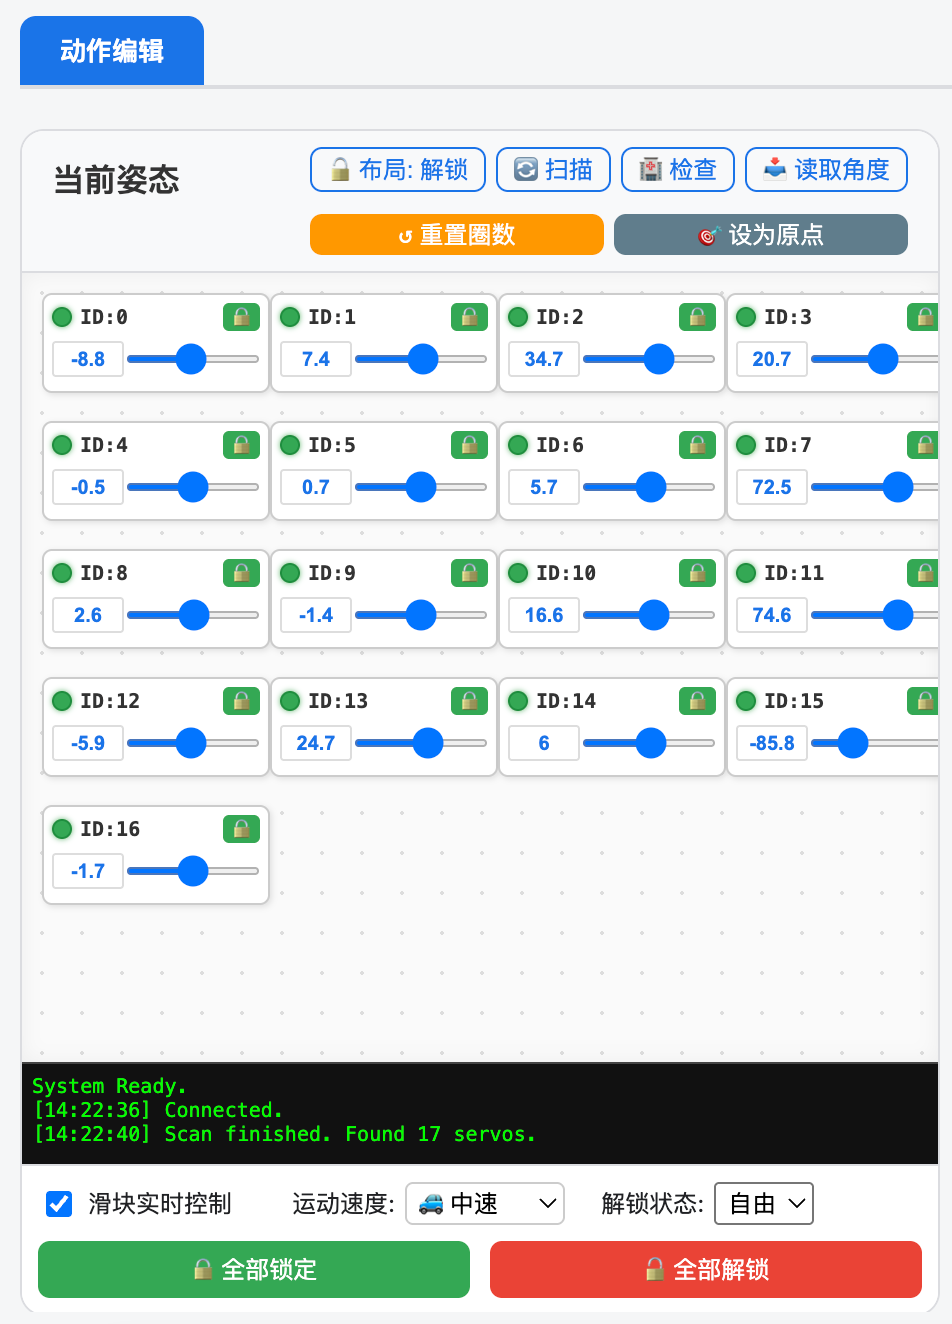
- Lock All / Unlock All: lock or unlock all currently online servo.
- Unlock State - Free: the servo enters the free state for easier manual positioning.
- Unlock State - Damping: the servo enters damping mode, and the damping value can be set.
Real-Time Control
- Live Slider Control: when enabled, dragging the slider of the corresponding servo unit sends commands in real time.
- Motion Speed: sets the execution speed used during real-time dragging.
Servo Control
- Input Angle: enter an angle in the cell and press Enter; the servo moves to the corresponding angle.
- Set Origin: set the current online servo position as the origin. Use this carefully.
- Check: check servo status, such as stall, over-voltage, and other abnormalities.
- Reset Turns: send a multi-turn count reset command to online servo.
Layout Adjustment
- Layout: Unlocked: freely drag each servo unit so it is arranged according to the actual robot structure and joint position.
- Layout: Locked: after locking, the cell positions cannot be dragged.
Other Action Group and Action Sequence Functions
Add Current Action
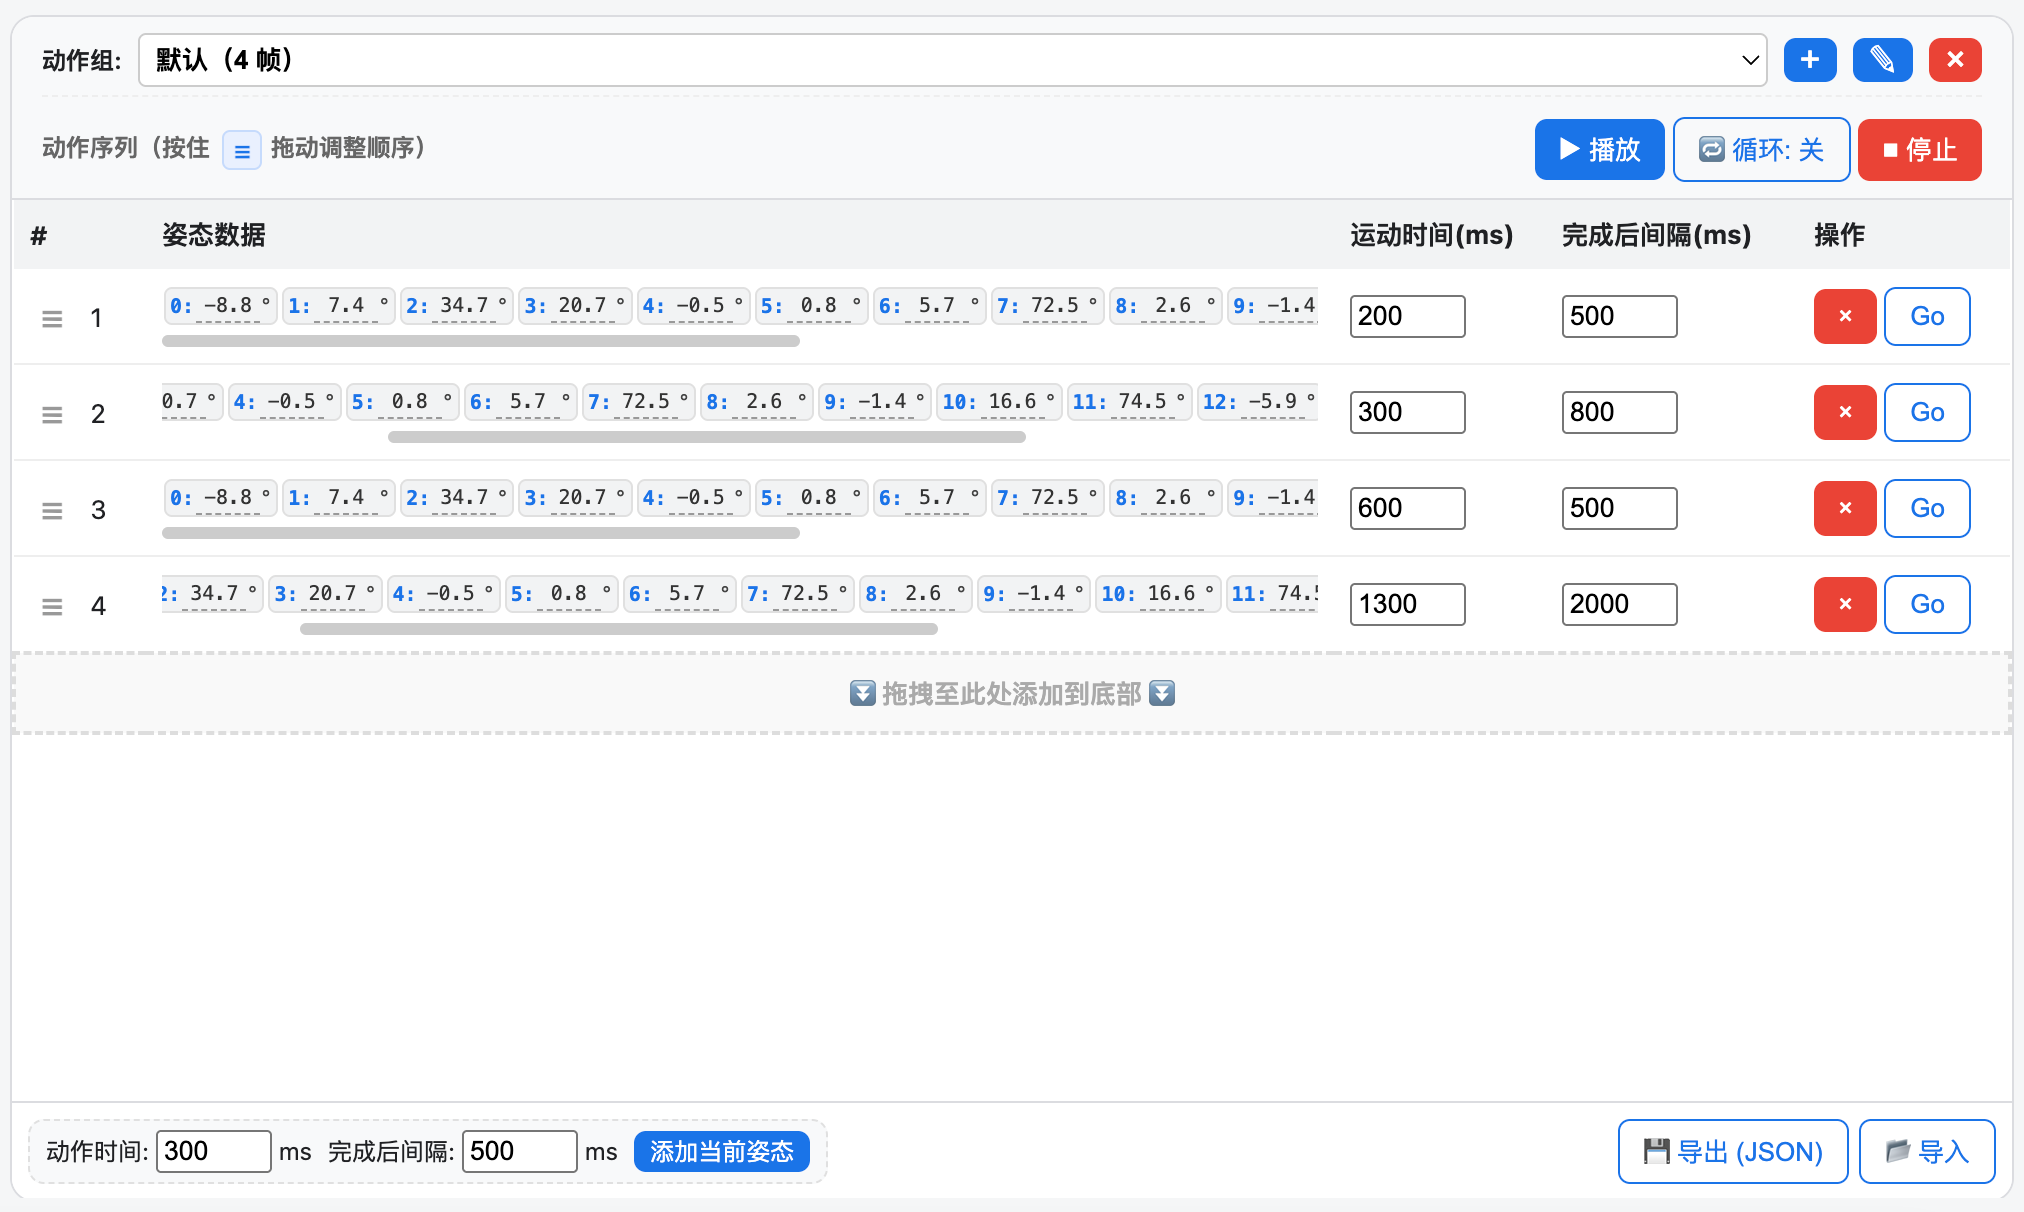
- Motion Time: the time required to execute the current frame.
- Post-Move Delay: the wait time after the current frame finishes and before the next frame starts.
- Add current pose: save the current angles of all servo as one frame.
Action Group
- action group: manages different motion projects. You can create, rename, or delete groups.
- action sequence: the frame list in the current action group, supporting drag-and-drop reordering.
Action Group Control
- Play: execute all frames in the current action group in sequence.
- Loop: when enabled, playback restarts from the beginning after it ends.
- Stop: interrupt the current motion playback.
Import and Export
- Export (JSON): export the current action group and layout data.
- Import: restore action group and layout data from a JSON file.
FAQs
No servo are found during scanning.
- Confirm that the adapter board is connected to power. A USB connection alone is not enough for normal detection.
- Confirm that the servo bus wiring direction is correct and that the supply voltage is within the servo operating range.
- Confirm that every bus servo has a unique ID. Do not connect servo with the same ID at the same time.
- If detection still fails, disconnect and reconnect, then scan again.
Only some servo are detected.
- First check whether the power supply capacity is sufficient to avoid some servo dropping offline due to insufficient power.
- Check whether the bus connection has poor contact or cable problems.
- Check whether duplicate IDs or an abnormal servo is interfering with bus communication.
After the adapter board is connected, the device does not appear in the serial port list.
- If the adapter board serial port information is not shown in the serial port list, the driver may not be installed correctly.
- Please download the CH340 driver, install it, and refresh the serial port list again.
During real-time drag control, the servo does not move smoothly.
- Open the servo Parameter Configuration option and confirm that Respond After Command Is Sent is disabled.
- If it is enabled, disable it, write the parameter, and test again.
The motion layout changes after import.
- The JSON file contains servo layout information.
- If the imported data is from an older version, the layout field may not exist. In this case, the page displays the default layout.