Servo Not Detected / No Response Troubleshooting
1. Checks When the PC Configuration Software Cannot Control the Servo Normally
1.1 Check the Supply Voltage
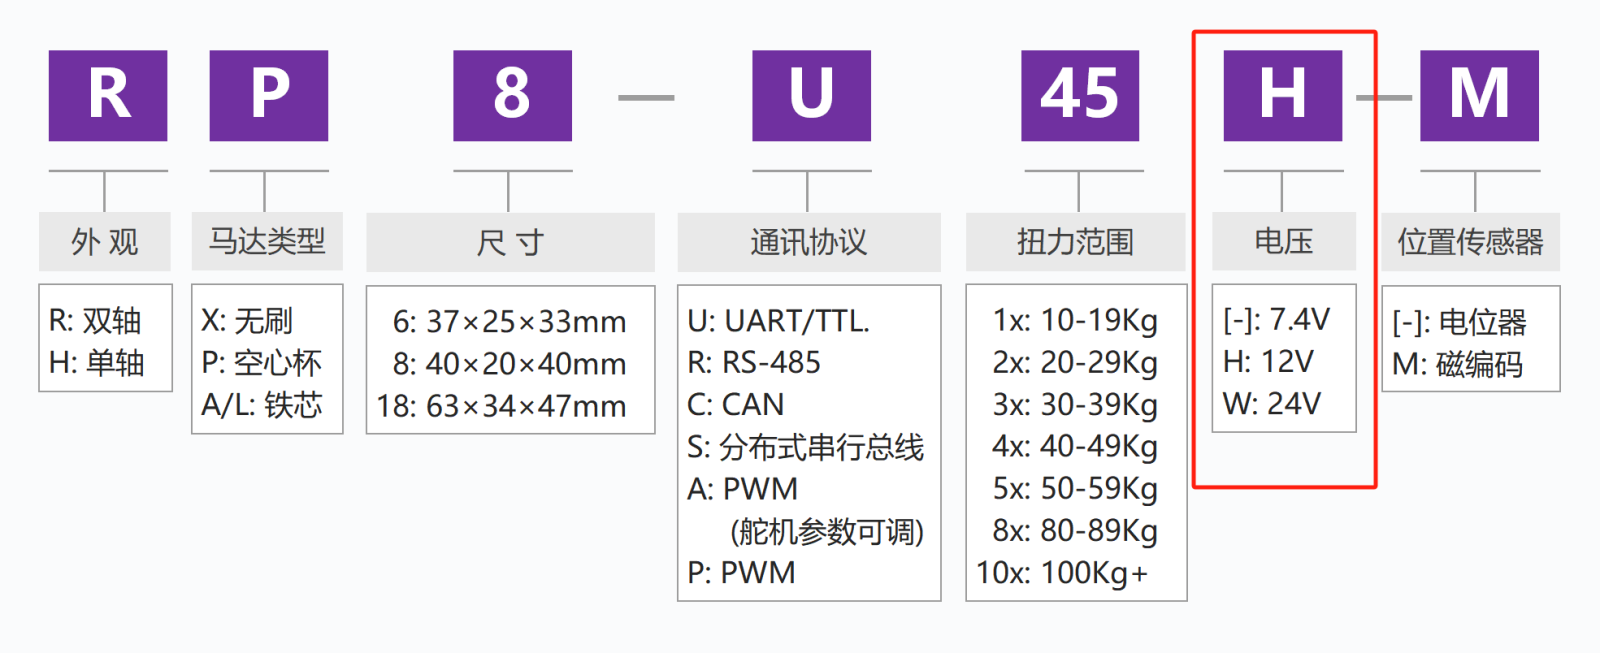
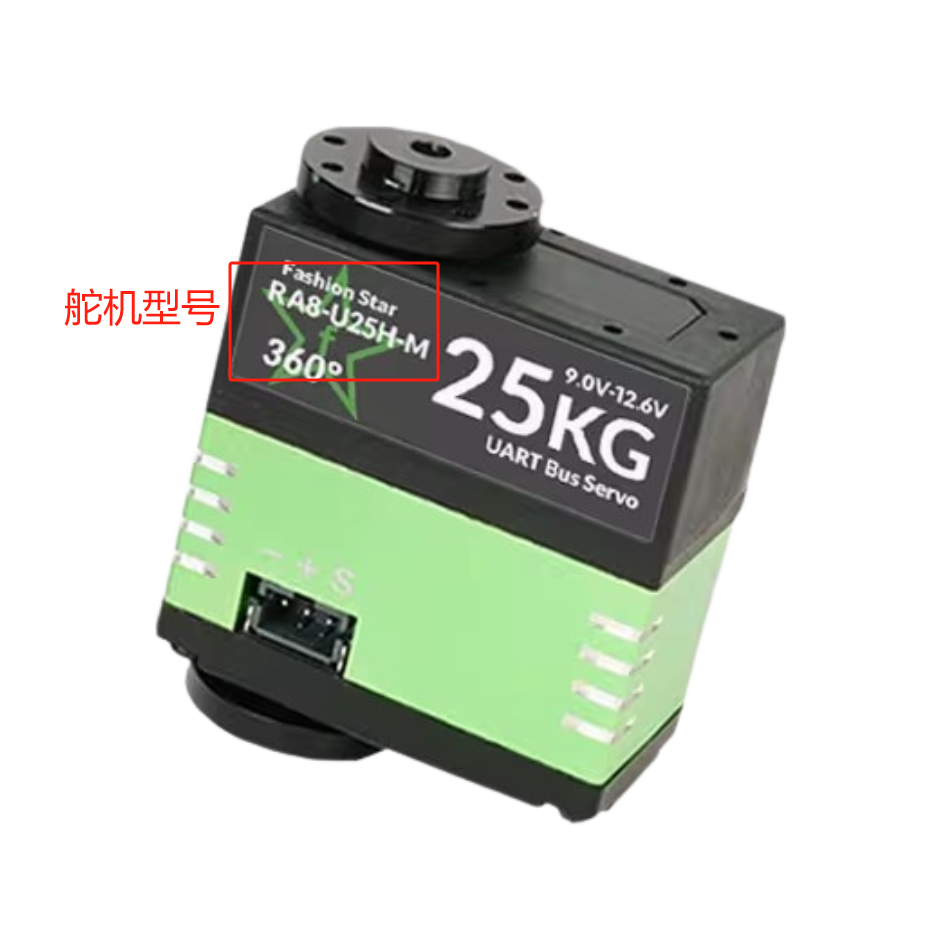
First, check whether the supply voltage is within the specified range for the servo. You can check the servo model: models without H are low-voltage versions (6.0 V-8.4 V), and models with H are high-voltage versions (9.0 V-12.6 V).
1.2 Check the Power-Supply Current Limit
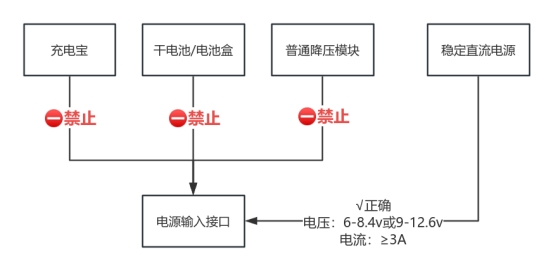
Check whether the power supply is current-limited. The power supply current should be at least 3 A. Use a stable and reliable DC power adapter, switching power supply, or other supply equipment with sufficient output capability. Avoid using power banks, dry batteries (including battery packs), or non-professional step-down modules. These devices may not provide stable voltage and sufficient current, or their power-on behavior may not match the system requirements.
1.3 Check Whether Undervoltage Protection Is Triggered Incorrectly
Try lowering the undervoltage protection threshold or replacing the power supply. Some power supplies on the market power up slowly. The servo main control chip operates at 3.3 V. When the chip finishes powering up and reaches 3.3 V, if the detected input voltage is still lower than the configured undervoltage protection threshold, the servo may incorrectly trigger undervoltage protection.

2. Solutions When the PC Configuration Software Cannot Scan the Servo
2.1 Check the Power Connection
First, check whether the power supply, adapter board, and bus servo are connected correctly in sequence. Make sure the wiring is not loose or incorrect. At this point, the power indicator on the adapter board should be on. The wiring method is shown below:
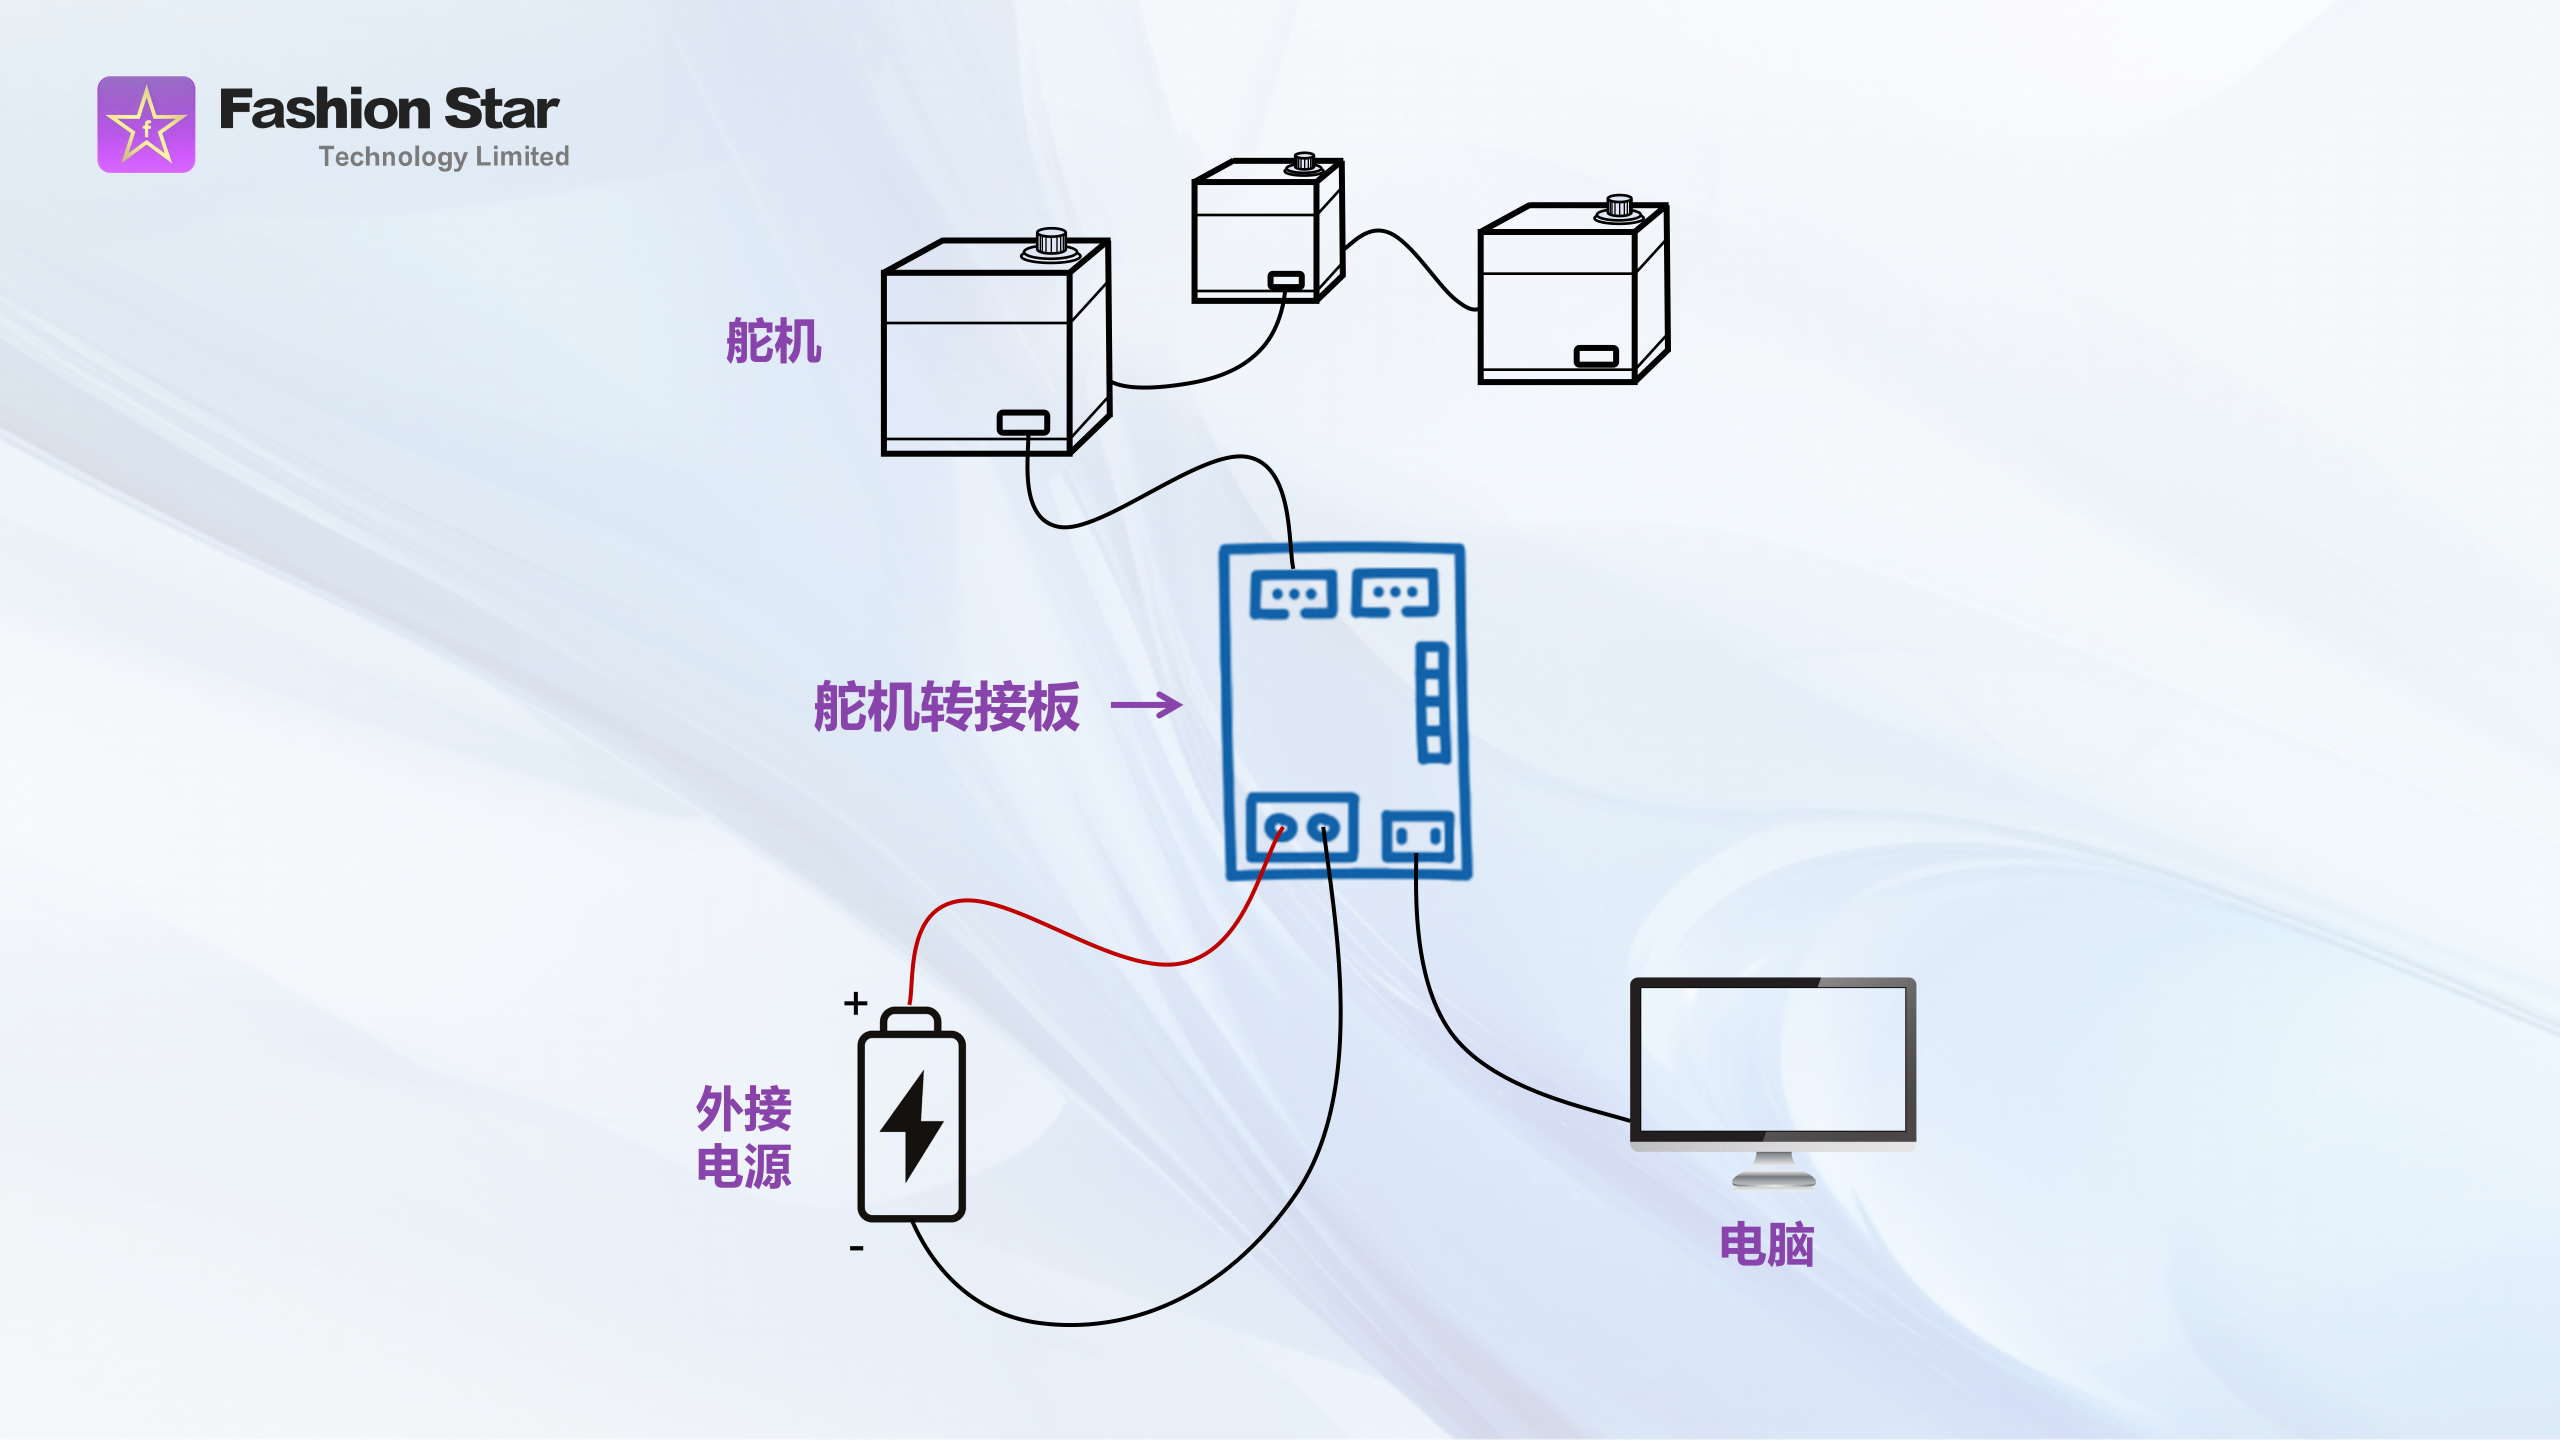
(The external power range for low-voltage servo units is 6.0 V-8.4 V. The required voltage for high-voltage servo units is 9.0 V-12.4 V.)
2.2 ID Conflict
Check whether multiple servo units are connected at the same time. The factory-default servo ID is #0. If multiple units are connected without changing their IDs, scanning may fail. Connect a single servo first, restart the device, and scan again. After the scan succeeds, assign different ID numbers to each servo in sequence.